Deploy Sally Office on Linux
Version Requirements
| Software | Version |
|---|---|
| WPS | WPS 11 Or WPS 12 |
| Office | Office 2024 +,Office 365 |
Install Sally
Get the Image (pick ONE)
A. Pull from Docker Hub (fastest)
docker pull sallysuite/sally-officeB. Offline bundle (air-gapped / low-bandwidth)
Download docker package from https://www.sally.bot#support (opens in a new tab) then
docker load -i sally-office<version>.tar
docker images        # verify
One-Container Trial (HTTP :3000)
Good for local dev. Plugins require HTTPS – continue to section 3 for production.
docker run -d -p 3000:3000 sallysuite/sally-officeVisit http://localhost:3000.
Production Stack – HTTPS & Nginx Reverse Proxy
You can clone the Git repository to get the docker-compose.yml files from here: deploy-sally-on-linux (opens in a new tab)
Recommended folder layout:
project-root/
├── docker-compose.yml          # symlink or copy of *.sqlite.yml / *.postgres.yml
└── nginx-proxy/
    ├── nginx.conf               # section 5
    └── ssl/
        ├── localhost.pem
        └── localhost-key.pem
Run the following command to start containers:
# SQLite (lightweight)
docker compose up -d -f docker-compose.sqlite.yml

# PostgreSQL (production)
docker compose up -d -f docker-compose.postgres.yml
Docker-Compose Reference
SQLite flavour
services:
  app:
    image: sally-office:latest
    restart: always
    ports: ["3000:3000"]
    environment:
      NEXTAUTH_URL: "https://localhost"
      DOMAIN_NAME: "https://localhost"
      ADMIN_EMAILS: "admin@sallyoffice.com"
      ADMIN_PASSWORD: "admin123"
      NEXTAUTH_SECRET: "SALLYOFFICE" # change in prod
      NEXT_PUBLIC_VERCEL_ENV: production
      ENABLE_ADMIN_AUTH: "true"

  nginx-proxy:
    image: nginx:alpine
    container_name: nginx-proxy
    restart: always
    ports: ["80:80", "443:443"]
    volumes:
      - ./nginx-proxy/nginx.conf:/etc/nginx/conf.d/default.conf:ro
      - ./nginx-proxy/ssl:/etc/nginx/ssl:ro
    depends_on: [app]
PostgreSQL flavour
services:
  app:
    image: sally-office:latest
    restart: always
    ports: ["3000:3000"]
    depends_on: [db]
    environment:
      NEXTAUTH_URL: "https://localhost"
      DOMAIN_NAME: "https://localhost"
      ADMIN_EMAILS: "admin@sallyoffice.com"
      ADMIN_PASSWORD: "admin123"
      NEXTAUTH_SECRET: "SALLYOFFICE"
      NEXT_PUBLIC_VERCEL_ENV: production
      ENABLE_ADMIN_AUTH: "true"
      POSTGRES_DATABASE: sallyoffice
      POSTGRES_HOST: db
      POSTGRES_USER: postgres
      POSTGRES_PASSWORD: passowrd01
      DATABASE_URL: postgres://postgres:passowrd01@db:5432/sallyoffice

  db:
    image: postgres:16-alpine
    container_name: postgres-db
    restart: always
    environment:
      POSTGRES_USER: postgres
      POSTGRES_PASSWORD: passowrd01
      POSTGRES_DB: sallyoffice
    volumes:
      - postgres_data:/var/lib/postgresql/data
    ports: ["5432:5432"] # remove if internal only

  nginx-proxy:
    image: nginx:alpine
    container_name: nginx-proxy
    restart: always
    ports: ["80:80", "443:443"]
    volumes:
      - ./nginx-proxy/nginx.conf:/etc/nginx/conf.d/default.conf:ro
      - ./nginx-proxy/ssl:/etc/nginx/ssl:ro
    depends_on: [app]

volumes:
  postgres_data:
Nginx Configuration (nginx.conf)
Drop-in file for nginx-proxy/nginx.conf.
Features: HTTP→HTTPS redirect, static asset caching, gzip, streaming /api/chat_proxy without buffering.
# ---------------- HTTP ----------------
server {
    listen 80 default_server;
    server_name _;
    return 301 https://$host$request_uri;
}

# ---------------- HTTPS ----------------
server {
    listen 443 ssl http2;
    server_name _;

    ssl_certificate      /etc/nginx/ssl/localhost.pem;
    ssl_certificate_key  /etc/nginx/ssl/localhost-key.pem;
    ssl_protocols        TLSv1.2 TLSv1.3;
    ssl_ciphers          ECDHE-ECDSA-AES128-GCM-SHA256:ECDHE-RSA-AES128-GCM-SHA256:ECDHE-ECDSA-AES256-GCM-SHA384:ECDHE-RSA-AES256-GCM-SHA384:ECDHE-ECDSA-CHACHA20-POLY1305:ECDHE-RSA-CHACHA20-POLY1305:DHE-RSA-AES128-GCM-SHA256:DHE-RSA-AES256-GCM-SHA384;
    ssl_prefer_server_ciphers off;
    ssl_session_timeout 1d;
    ssl_session_cache   shared:SSL:50m;
    ssl_session_tickets off;
    # add_header Strict-Transport-Security "max-age=63072000" always;  # enable after testing

    # static libs & fonts – cache 1 day
    location ~* ^/(lib|font) {
        proxy_pass http://app:3000;
        proxy_set_header Host $host;
        proxy_set_header X-Real-IP $remote_addr;
        proxy_set_header X-Forwarded-For $proxy_add_x_forwarded_for;
        proxy_set_header X-Forwarded-Proto $scheme;
        expires 1d;
        add_header Cache-Control "public, max-age=86400";
        gzip on;
        gzip_types text/plain text/css application/json application/javascript text/xml application/xml application/xml+rss text/javascript image/svg+xml;
        gzip_comp_level 6;
        gzip_min_length 1000;
    }

    # streaming chat proxy – no buffering
    location /api/chat_proxy {
        proxy_pass http://app:3000;
        proxy_http_version 1.1;
        proxy_set_header Connection "";
        chunked_transfer_encoding on;
        proxy_buffering off;
        proxy_cache off;
        proxy_set_header Host $host;
        proxy_set_header X-Real-IP $remote_addr;
        proxy_set_header X-Forwarded-For $proxy_add_x_forwarded_for;
        proxy_set_header X-Forwarded-Proto $scheme;
    }

    # default frontend
    location / {
        proxy_pass http://app:3000;
        proxy_set_header Host $host;
        proxy_set_header X-Real-IP $remote_addr;
        proxy_set_header X-Forwarded-For $proxy_add_x_forwarded_for;
        proxy_set_header X-Forwarded-Proto $scheme;
    }
}
SSL Certificate Preparation
Local self-signed (365 days)
openssl req -x509 -newkey rsa:4096 -nodes \
  -keyout localhost-key.pem -out localhost.pem -days 365 \
  -subj "/CN=localhost"
Production
Place valid certs/keys from Let’s Encrypt or any CA into
./nginx-proxy/ssl/localhost.pem
./nginx-proxy/ssl/localhost-key.pem
and update server_name accordingly.
Useful Commands
# logs
docker compose logs -f app
docker compose logs -f nginx-proxy

# restart
docker compose restart

# update image
docker compose pull && docker compose up -d
You now have:
- Dev mode – single container on HTTP
- Prod mode – HTTPS offload, cached static assets, streaming chat endpoint, optional PostgreSQL
Copy the snippets you need and enjoy Sally Office!
Configuration
Configure Model
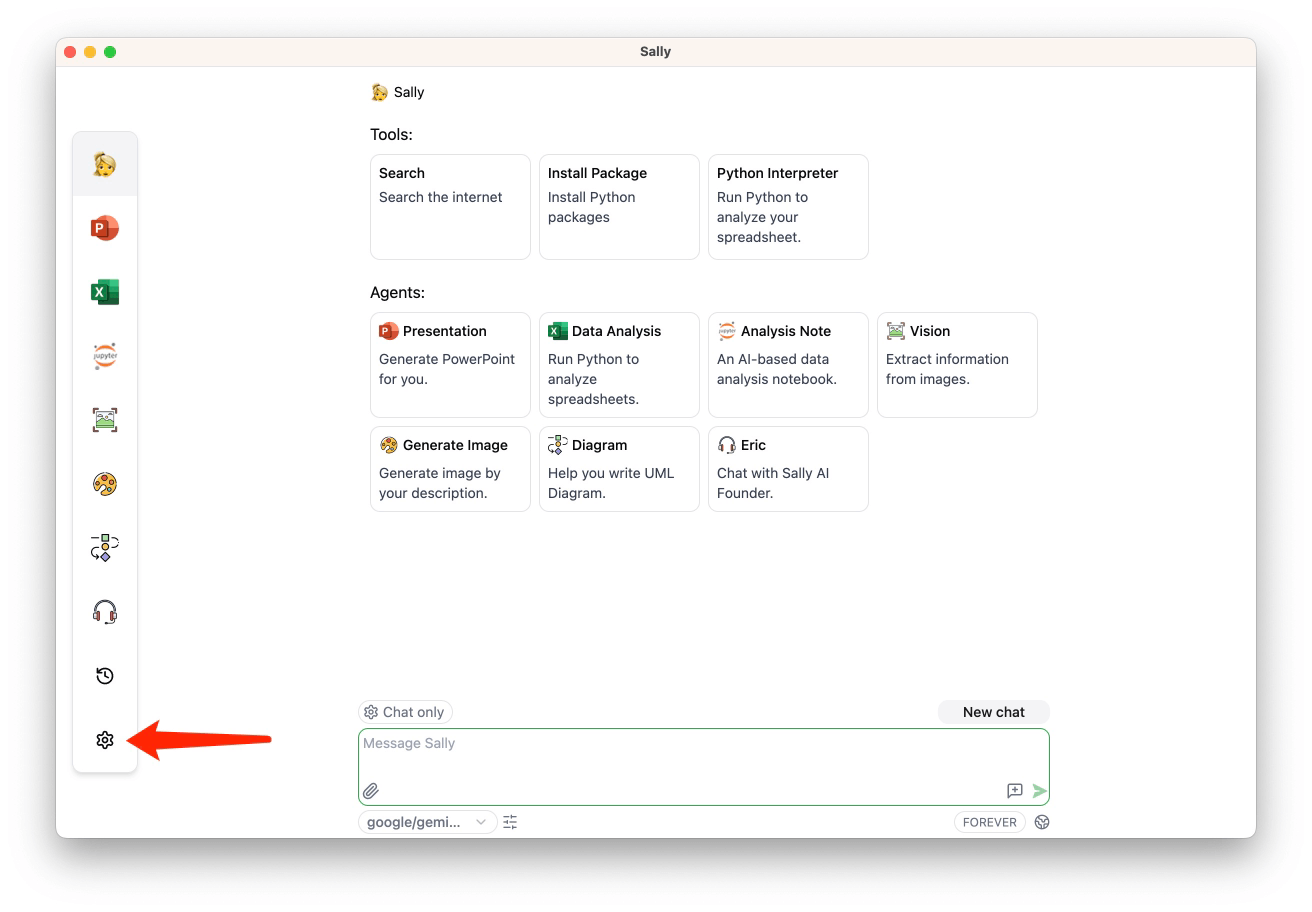
Start Sally, then click the settings icon in the left menu.
In the left navigation, select Models. The left side shows a list of model providers, and the right side displays a list of models.
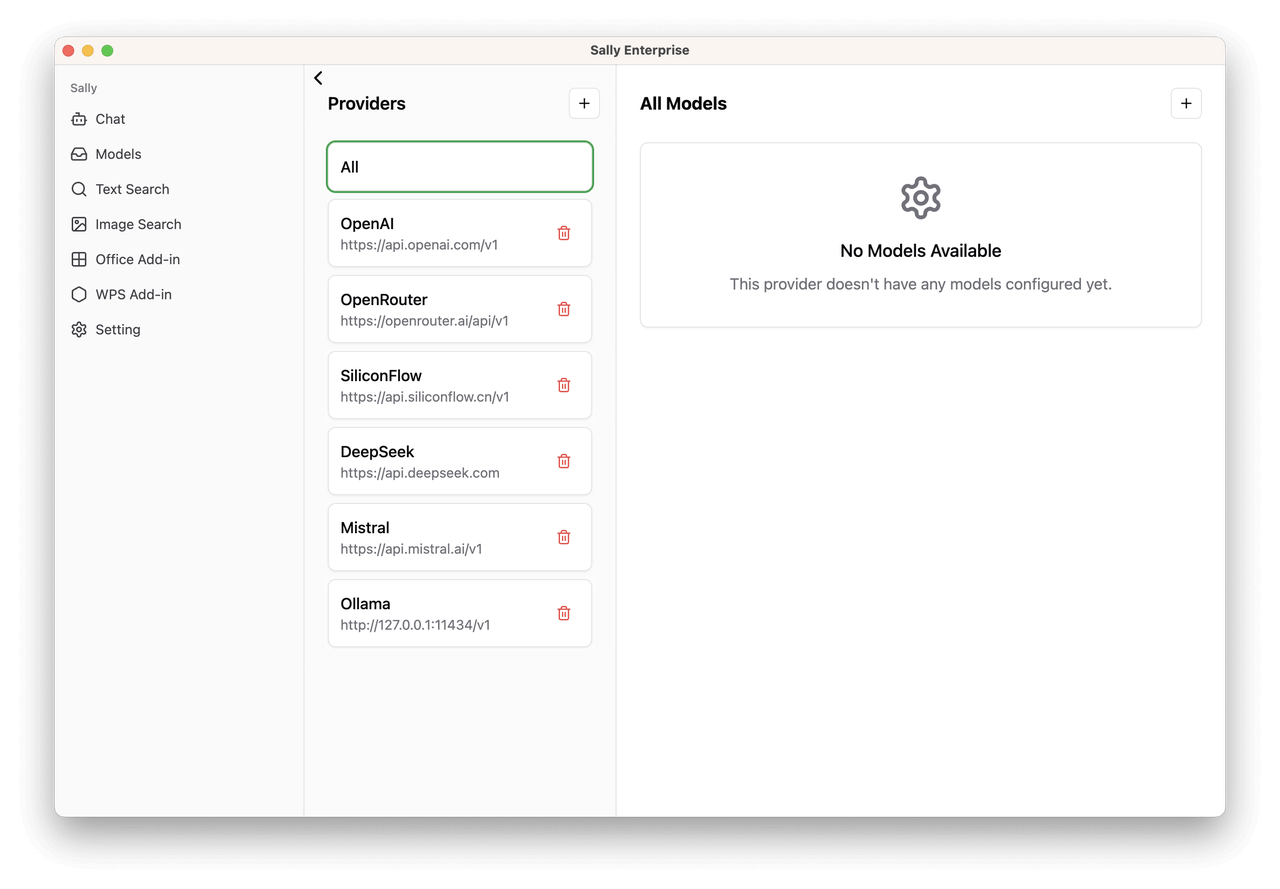
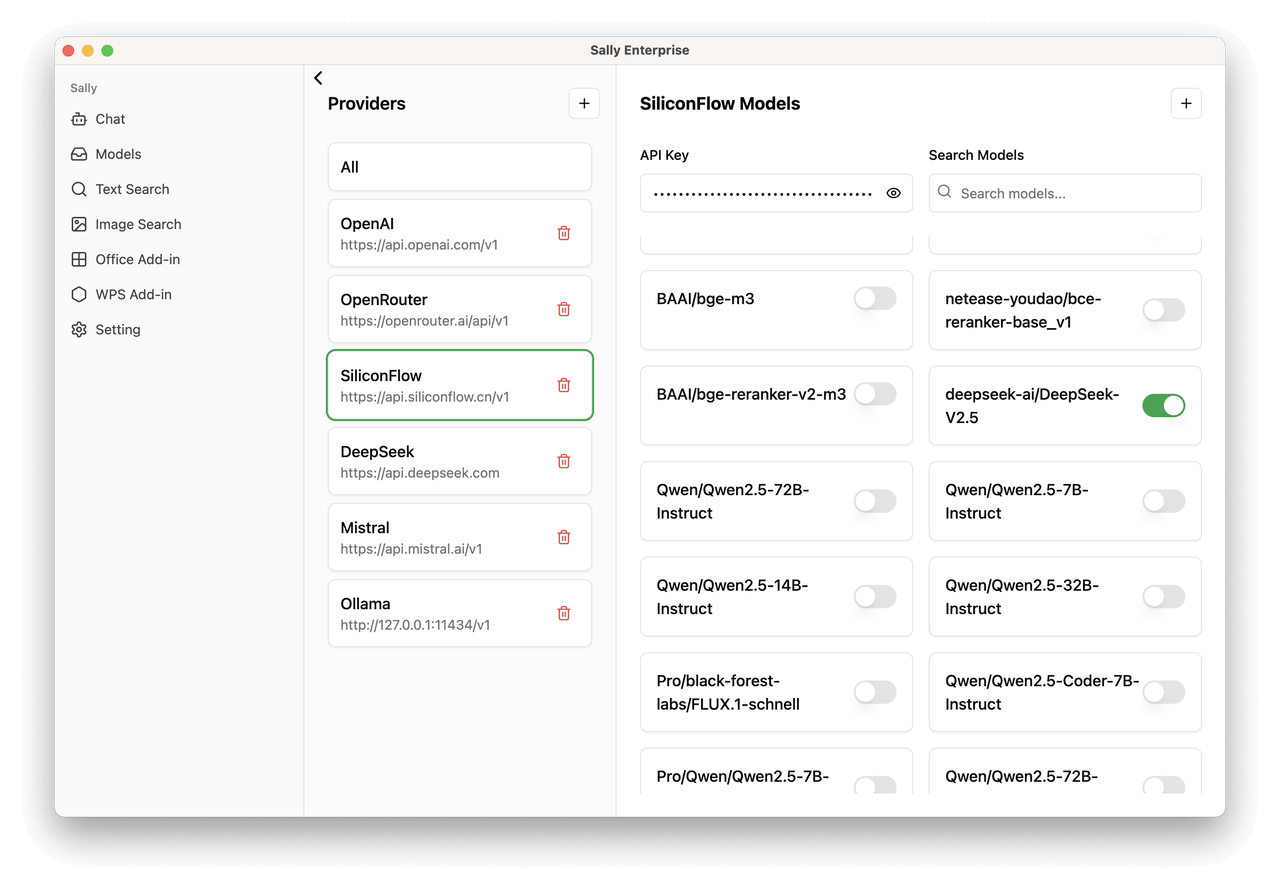
You can select a model provider, register on the provider's official website to obtain an API Key, fill in the API Key, and select the model you want to use.
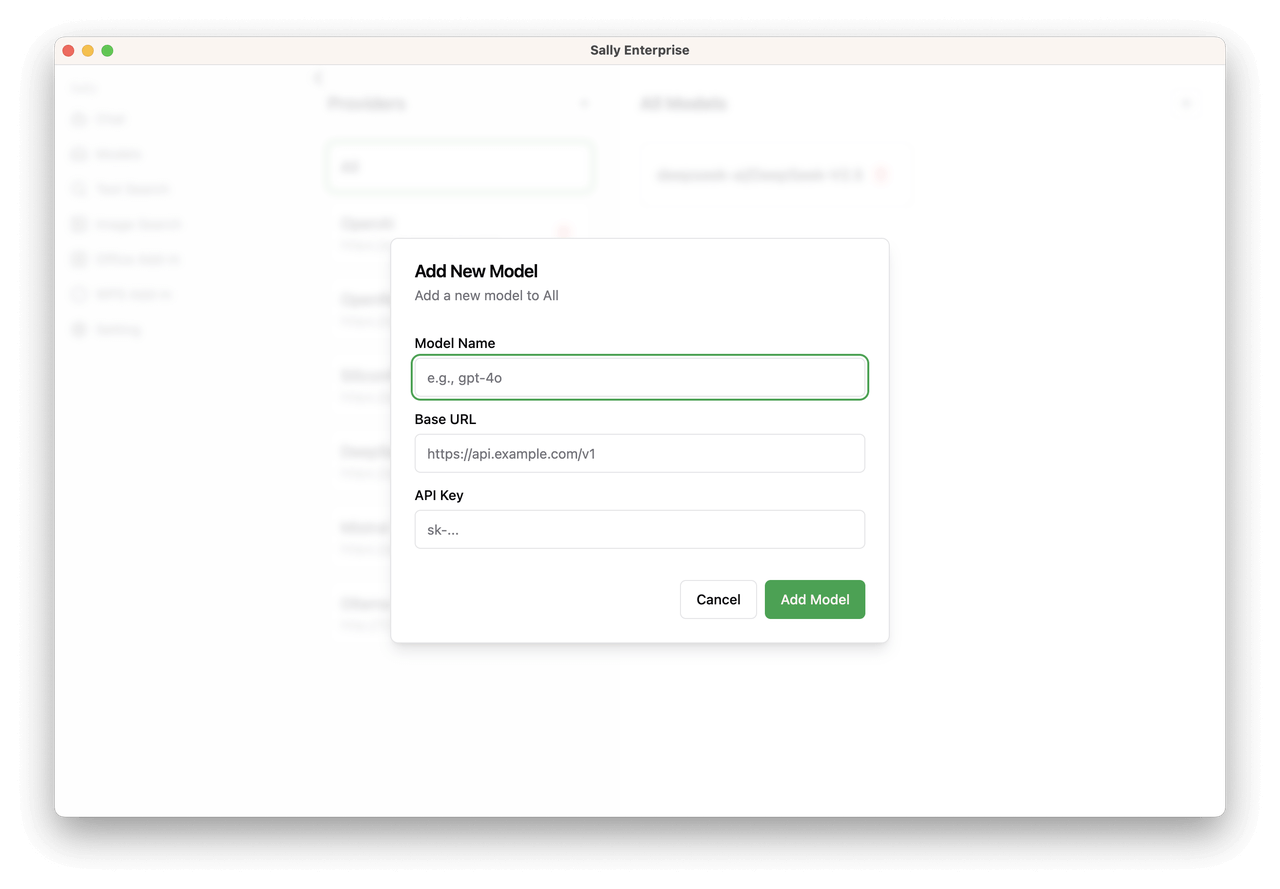
You can also configure a privately deployed model within the enterprise, obtain the Base URL, API Key, and model name of the privately deployed model, click the + button, and add a new model.
Configure Search Service
Currently, the search service uses the searchapi interface.
Get API KEY: Log in to the official website to obtain API KEY: https://www.searchapi.io/ (opens in a new tab)
- Select Text Search, set up text search. Searchapi supports both Google Search and Baidu Search.
- Select Image Search to set up image search.
Office Add-in Deployment
Download Manifest File
Click the Manifest menu on the left to enter the Manifest page, which is divided into two configuration files:
- Office (Word, Excel, PowerPoint)
- Outlook
Select Office or Outlook.
⚠️ The domain name set online must be a domain name using the HTTPS protocol.
Click Download to download the Manifest file.
Deploy the Manifest File on Windows
- Copy the Manifest file to a folder
- Set this folder as a shared folder
- Add the shared folder to the trusted add-in locations:
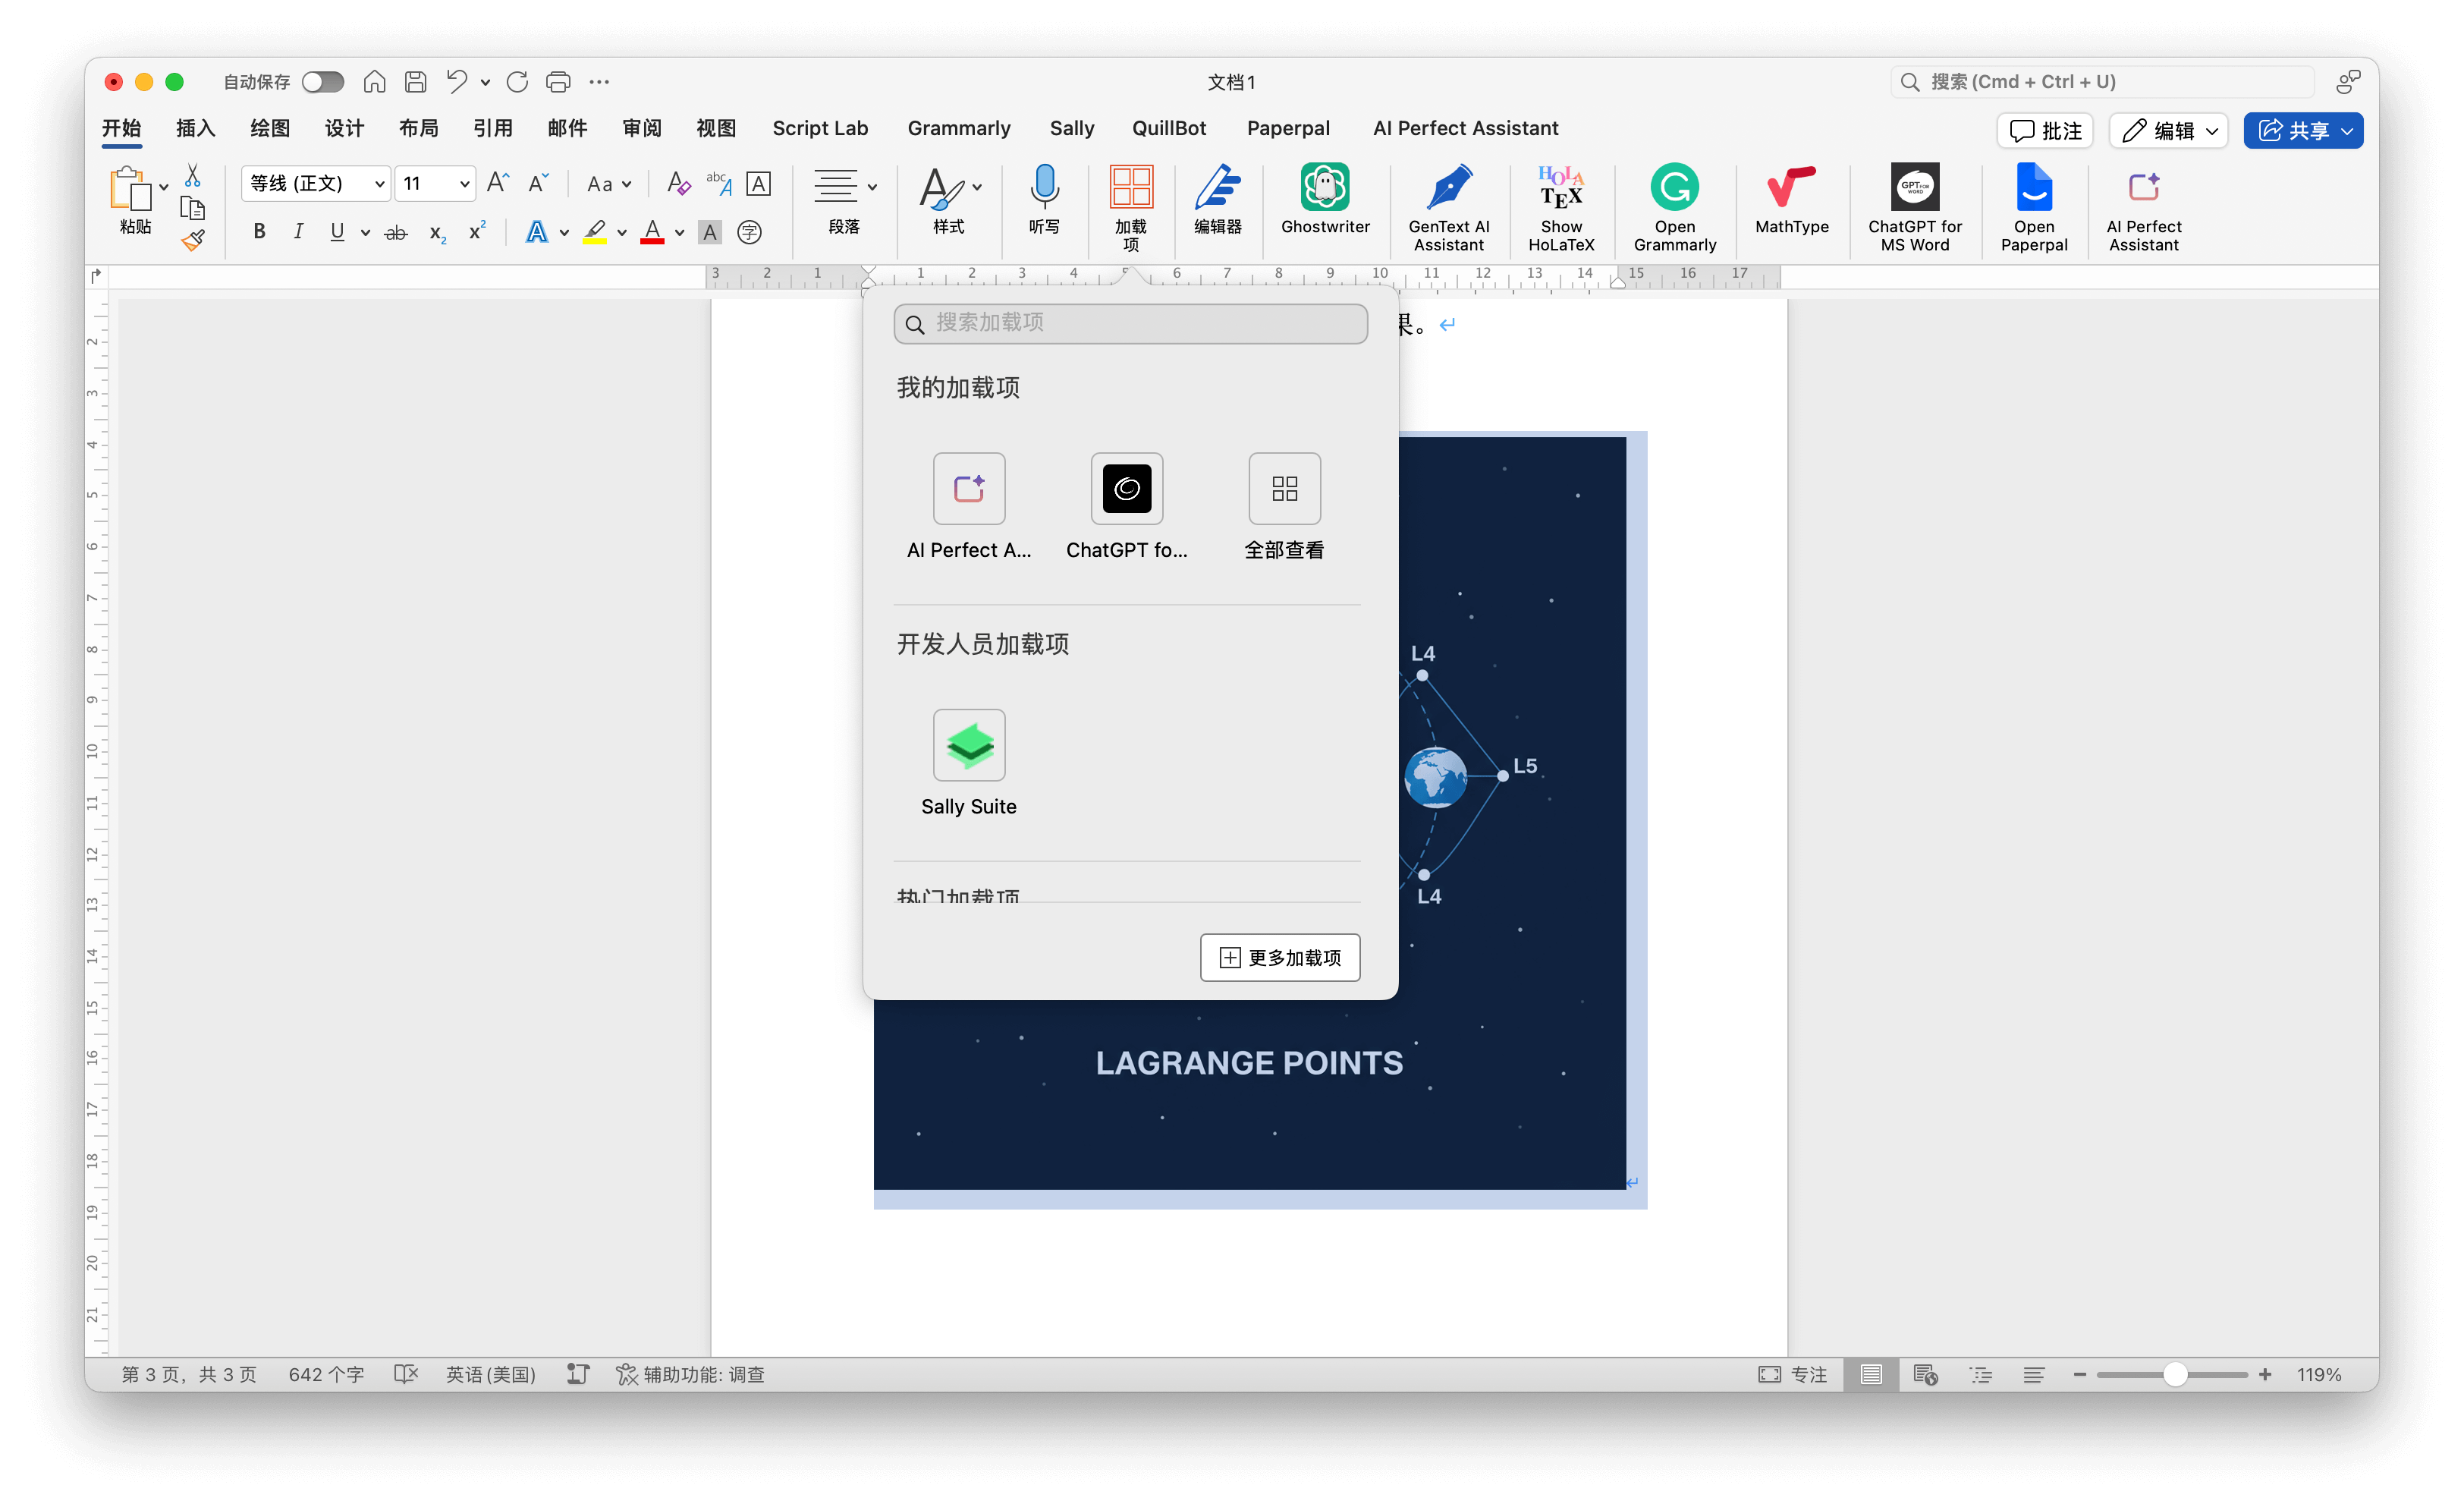
File > Trust Center > Trusted Add-in Locations - Open Word, go to Add-ins → More Add-ins, select Sally in the Shared tab, and click Add.
Deploy the Manifest File on Mac Office
Refer to the deployment documentation:
https://learn.microsoft.com/en-us/office/dev/add-ins/testing/sideload-an-office-add-in-on-mac (opens in a new tab)
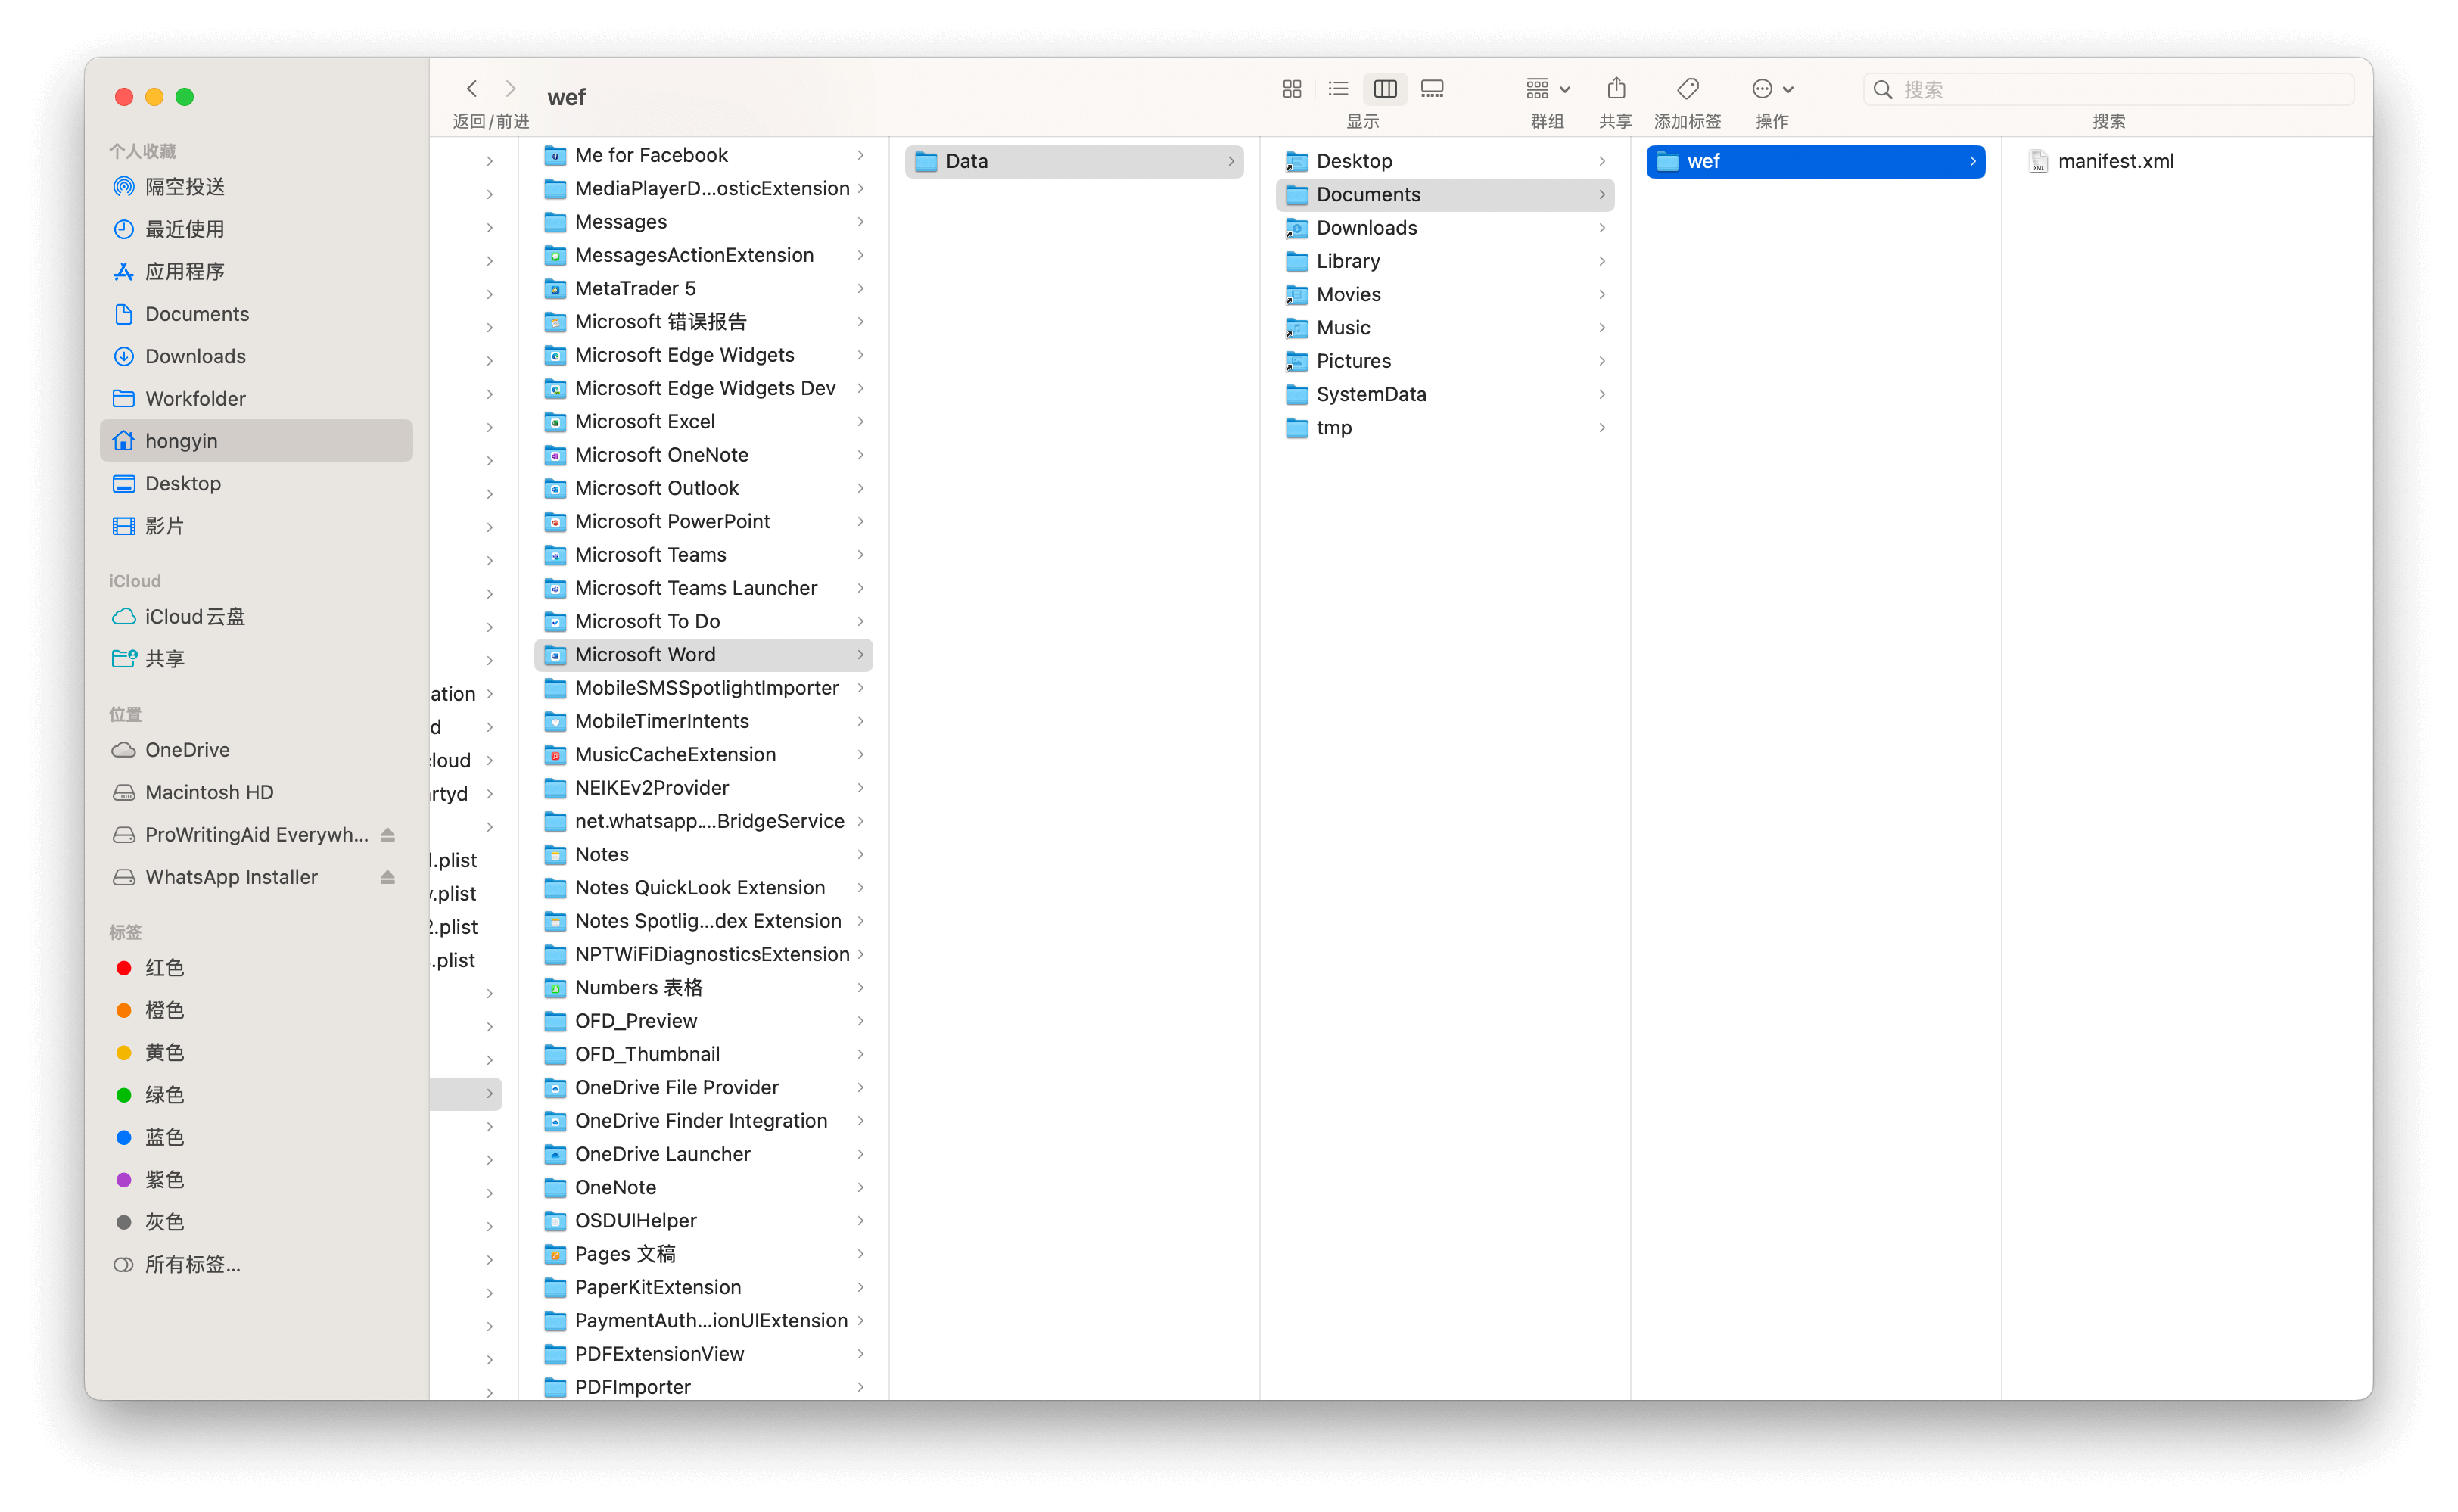
Use Finder to install the manifest file:
- Open Finder, then press
Cmd+Shift+Gto open the "Go to Folder" dialog box. - Enter one of the following paths (create the
weffolder if missing):
- Word:
/Users/<username>/Library/Containers/com.microsoft.Word/Data/Documents/wef - Excel:
/Users/<username>/Library/Containers/com.microsoft.Excel/Data/Documents/wef - PowerPoint:
/Users/<username>/Library/Containers/com.microsoft.Powerpoint/Data/Documents/wef
Note: The remaining steps describe how to sideload a Word add-in.
Copy your add-in manifest file to this wef folder.
Open Word (restart if already running), then open a document. Go to Start > Add-ins, then choose your add-in from the menu.
Confirm that your add-in is displayed in Word.
WPS Plugin Deployment
Get the Plugin Installation Address
Select the menu in the background: WPS Add-in, and view the add-in installation address.
Example: https://localhost:5893/wps-doc/entry/publish.html
Plugin Installation
- Copy the plugin installation address to the browser.
- Before installation, open WPS, refresh the page, and the plugin installation page will display two plugins:
- wps-sheet: corresponds to the spreadsheet plugin
- wps-doc: corresponds to the document plugin
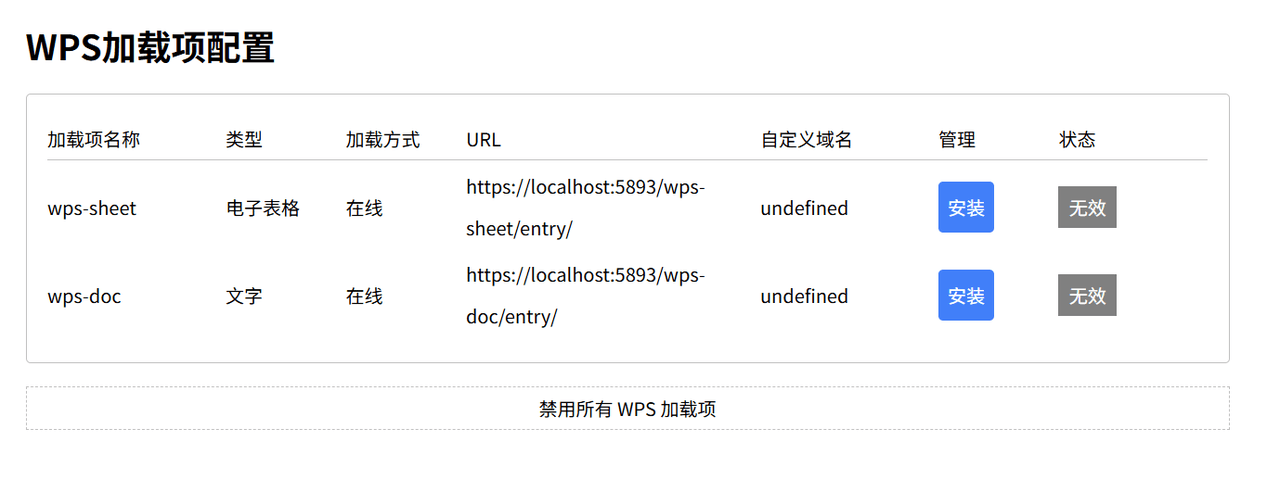
- Click Install, and it will prompt that the configuration was successful.
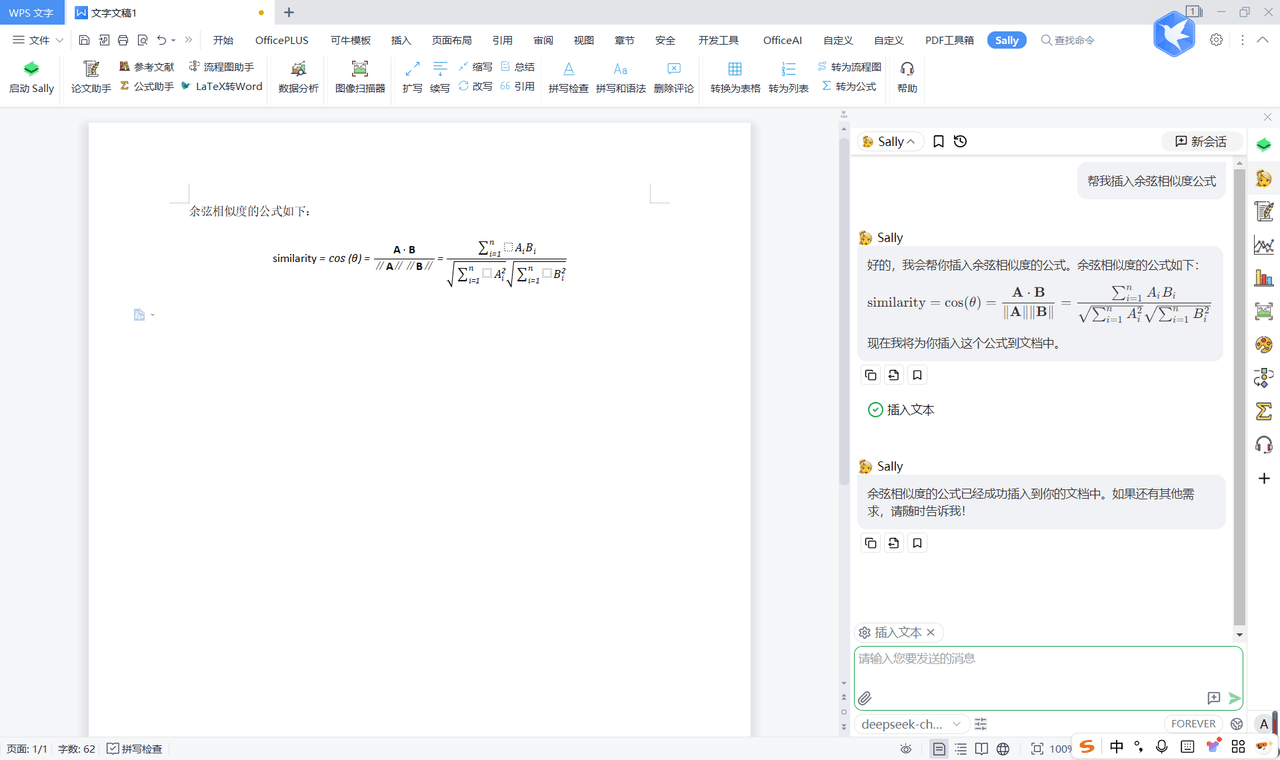
- Open WPS Word, wait a moment, and the Sally menu will appear, indicating successful installation.
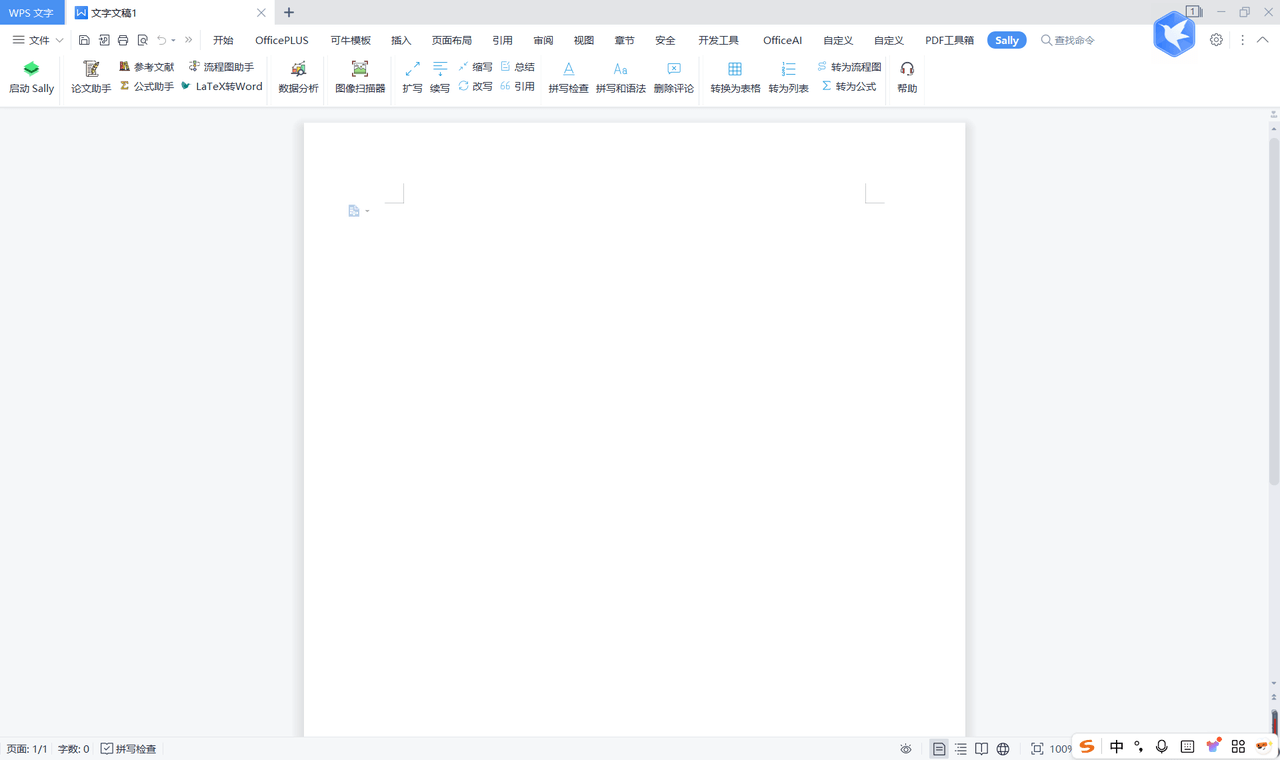
Click to start Sally, select a model in the sidebar, and start chatting with the model.
Contact Us
If you encounter any issues during deployment, please contact us at sally-suite@hotmail.com.